

Rustica field guide · Exterior planning
How to Seal Exterior Barn Doors: Gaps, Weather and Fit
To seal an exterior barn door, first identify the opening’s use, weather exposure and the gaps around the closed panels. Select head protection, side seals and a bottom detail that are designed for that door system. Keep drainage and door movement clear, then check the completed installation. A brush or weather-resistant slab alone does not make an opening airtight or watertight. A conditioned-room entrance needs a complete exterior assembly suited to that use.
Make it useful
Plan an exterior-door inspection
Record the opening’s use and exposure, then choose the areas to inspect. Build a checklist to take to the installer before selecting seals.
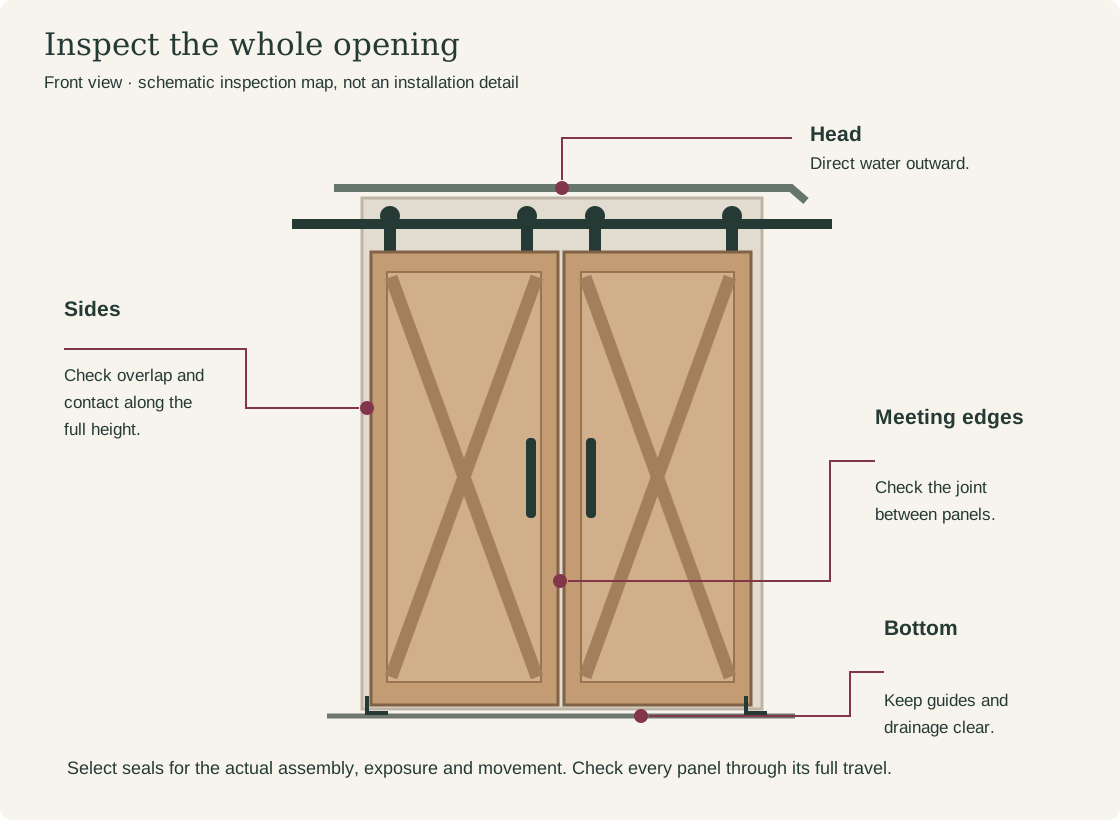
Illustrative locations. The selected system determines the actual flashing, seal, guide and drainage details.
Your inspection checklist
- Record the opening’s use before choosing a sealing system.
- Identify weather exposure, including rain paths above the opening.
- Choose the locations you want to inspect, or use the full perimeter map below.
For every opening, check smooth travel, guide engagement, drainage and inside/outside operation after any change. Select parts from the assembly instructions; this planner does not specify a seal or verify weather performance.
A privacy brush and an exterior weather seal have different jobs. Rustica Latch + Lock is an interior light-duty product, not an exterior security solution. For a conditioned or regulated opening, obtain the appropriate complete-assembly specification.
Full guide and sources: https://rustica.com/seal-exterior-barn-doors/
Start with the building and the exposure
A barn, shed and heated living room do not place the same demands on a doorway. Before buying seals, decide whether the door closes an unconditioned space, serves as a secondary cover, or forms the weather boundary of an occupied building.
| Opening | Main planning questions |
|---|---|
| Unconditioned barn or shed | What weather, debris and animal access must the enclosure manage? How exposed is it? |
| Secondary cover outside another door | How will water drain, and can both doors still operate as intended? |
| Conditioned room or home entrance | What complete assembly is specified for air leakage, water, security and the opening’s required use? |
| Large paired opening | How do the head, bottom and meeting edges work together when both panels close? |
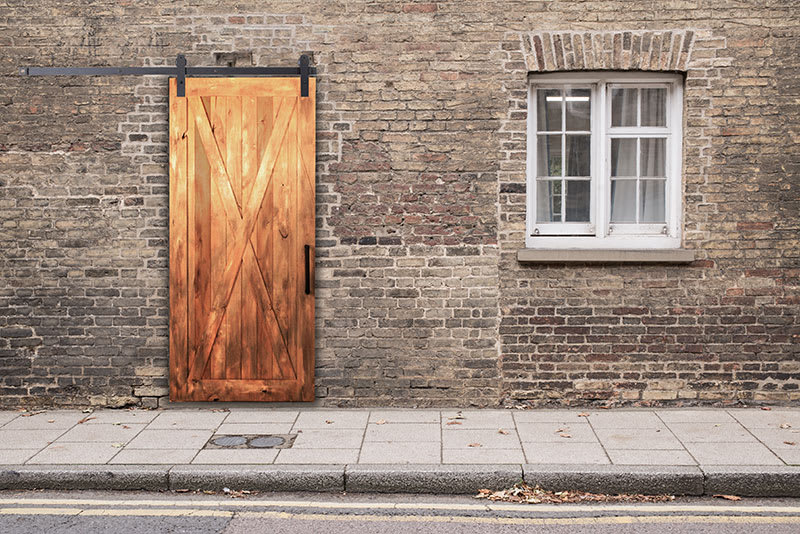
Rustica’s Outdoor Rated Barn Door is offered as an exterior-grade cedar door. The panel material and finish are part of the choice, but the surrounding installation still needs a suitable weather detail. Compare front entry door assemblies when planning a home entrance.
Inspect movement before adding seals
Close the door normally and photograph the head, both sides, bottom and any meeting joint. Note whether gaps stay even or widen at one end. Then move each panel through its full travel and watch for rubbing, loose hardware or movement out of the guide.
A seal should fit a properly operating assembly. It should not be used to hold a sagging panel in position or compensate for a loose track. Address the support, guides and alignment according to the system instructions before selecting the final seal dimensions.
The U.S. Department of Energy’s exterior-door weatherstripping job aid follows the same general principle: correct door problems and preserve smooth operation when adding weatherstripping. Its illustrated work is for a conventional exterior door, so use your barn-door manufacturer’s details for the actual installation.
Map the whole perimeter
| Location | What to inspect | What the detail must accomplish |
|---|---|---|
| Head and track area | Water paths above the opening and exposure of the track. | Direct water outward while preserving hardware movement and service access. |
| Side edges | Gap size, overlap, contact surfaces and changes along the height. | Maintain the intended contact when closed without binding during travel. |
| Bottom | Floor or sill slope, clearance, guide location and drainage. | Limit the intended leakage while keeping movement and drainage paths clear. |
| Meeting edges | The gap or overlap between closed panels. | Join the two panels with a detail intended for their arrangement. |
| Fixed wall or frame joints | Cracks and failed sealant at stationary interfaces. | Connect the opening to the surrounding weather barrier as designed. |
Measure the gaps where the selected seal would mount, not from an unrelated part of the track. Record the largest and smallest clearances and any change through travel. A brush that contacts at the middle but misses the top does not provide continuous coverage.
Choose each component for its job
There is no universal four-piece kit that makes every exterior barn door weather-tight. A component must suit the direction of movement, contact surface, gap range and exposure. It also needs an installation detail that works with the neighboring components.
| Component | Role | Limit to check |
|---|---|---|
| Head flashing or rain guard | Direct water away from a vulnerable upper edge or track area. | Its connection to the wall’s drainage plane and its end details. |
| Brush seal | Provide flexible contact across a specified gap while allowing movement. | Mounting geometry, exposure and documented performance for the selected use. |
| Gasket or compression seal | Seal by contacting or compressing against a matching surface. | Whether the door system produces the required contact without forcing the slab. |
| Bottom seal and sill detail | Treat the lower edge and manage water at the threshold. | Floor variation, guide clearance, drainage and the permitted opening function. |
| Sealant at a stationary joint | Close an appropriate fixed interface. | Material compatibility, joint design and continuity with the surrounding weather barrier. |
The Department of Energy distinguishes weatherstripping for moving components from caulk at stationary joints. That distinction helps prevent a common mistake: filling a gap that the door needs in order to move or drain.
Work through the head, sides and bottom
Head protection
Look above the track as well as directly above the slab. Water can arrive from the wall surface or a failed joint higher up. A head cover should be part of the building’s water-management detail, with water directed outward. The correct flashing and sealant arrangement depends on the wall and door system.
Side seals
Choose a seal that can be mounted to a suitable surface and contact the intended opposing surface. Check variations along the full height. Keep the carrier clear of trim and hardware as the door opens. Do not force the slab inward to compensate for a seal that cannot reach.
Bottom and meeting edges
Measure the lower clearance along the full travel, including the highest floor or sill point. Keep the floor guide and required drainage working. Paired doors also need the center joint addressed; two well-sealed outside edges do not close a gap between the panels.
Follow the system’s instructions for joints where head, side and bottom components meet. Those intersections deserve close inspection because a small uncovered corner can interrupt an otherwise continuous detail.
Can a privacy brush weatherproof an exterior door?
Use the barn door privacy-gap guide to evaluate a view through a side gap. A sweep’s nominal brush size does not establish the air, water or thermal performance of an exterior opening. Select a product specified for the intended weather exposure and location.
Brushes, gaskets, rain guards and slab finishes are parts of an assembly. Performance also depends on the mounting, contact, corners, sill and surrounding construction. Neither a product photo nor a successful hand check establishes an airtight or watertight rating.
For a conditioned building, ask for the applicable performance information for the proposed assembly. Do not convert a brush’s component specification into a whole-door rating. A field inspection can find a problem; a formal performance claim needs the corresponding evidence.
Use latches designed for the assembly
A latch can hold a door at its closing position. Some systems are designed to compress a seal; others are not. Follow the system’s specified latch and adjustment method rather than adding a toggle latch and tightening it until the panel bends toward the wall.
The Rustica Latch + Lock is an interior residential, light-duty product and is not intended as a security solution. Do not select it as the security basis for an exterior entrance. The barn door latch comparison explains the difference between a catch, privacy function and security application.
For an occupied space, resolve inside opening and any required exit function before choosing exterior locking hardware. An outside padlock alone can prevent someone inside from opening the door. Fire-rated or other regulated openings need an approved complete arrangement, not an improvised collection of parts.
Check the completed installation
- Operate every panel through its full travel. Check the guides, handles, latches and seals together.
- Inspect the contact at each edge and at the corners with the door in its normal closed position.
- Check that the added components have not blocked drainage or created a place for debris to collect.
- Confirm inside and outside operation of the selected hardware.
- Inspect the opening after ordinary weather and address signs of leakage using the system’s approved details.
A visible gap or a draft can help locate a problem, but the absence of a visible gap does not prove a performance rating. Where the project requires measured air or water performance, use a qualified professional and the applicable test procedure.
Include hardware and finish care in routine maintenance. The barn door hardware care guide explains why cleaning products and lubrication depend on the actual hardware and finish.
Common exterior sealing questions
Can I use garage-door seals on a barn door?
Only if the product and door-system specifications support that use. The shape, movement, mounting surface and compression may differ. Similar appearance is not enough to establish fit.
Should I fill every gap with caulk?
No. Use sealant only at the appropriate stationary joints. Keep moving clearances and designed drainage open. If you cannot identify a gap’s purpose, check the installation detail before filling it.
Will a thicker wood slab stop drafts?
Drafts pass through air paths around or through an assembly. A thicker slab does not close an edge gap. Assess the slab and perimeter together rather than treating one dimension as a complete sealing solution.
Can I make an existing interior barn door suitable for outdoors?
Adding a sweep does not establish exterior suitability. Confirm the slab, finish, adhesive, hardware, supports and seals for the exposure. Replacing the assembly may be the appropriate choice if those requirements cannot be met.
Bring the full opening into the project plan
When discussing exterior barn door options, bring photos, measurements, exposure details and the intended use of the building. That information helps define the needed panel, hardware and weather details before the order.
Contractors can register for Rustica’s contractor discount program and bring the door schedule and project requirements to the team. Keep the proposed sealing and hardware details with the order so the installation can be checked against the selected system.
Keep planning your project
Sources and product documents
Bring your measurements to the next conversation.
Explore the contractor discount program

