


| Layout | Where the open leaf goes | What to check |
|---|---|---|
| Bypass | In front of or behind another leaf. | The stacked panels still cover part of the opening; test access to drawers. |
| Wall-mounted single | Along the wall beside the closet. | Clear parking wall, switches, furniture, trim and pull clearance. |
| Converging pair | One leaf parks on each side. | Both parking areas and the meeting detail at the center. |
| Into a framed wall cavity. | Pocket size, wall services, structural changes and access to hardware. | |
| Bifold alternative | Panels fold together at the side. | Folded stack width and projection into the room; it still uses hinges. |
Test access with the storage layout
Sketch the opening with the doors fully open, fully closed and at an intermediate position. Add the full projection of every drawer, basket and pull-out. A center drawer bank may be awkward behind a two-leaf bypass pair even when the door installation itself is correct.
Two people sharing a closet may prefer separate accessible zones. Sliding both bypass leaves toward the center can expose portions of the ends in some layouts, but it does not uncover the whole closet. A converging pair can clear more of the opening when both sides have enough parking space.
Use the closet hardware guide to coordinate the storage and hardware. Changing the door does not increase the closet’s physical floor area; the benefit is a different use of the approach and surrounding wall.
Measure the opening and its surroundings
Record the finished opening width at several heights and the height at several points. Check jamb plumb, the top edge and the floor across the full travel. Note casing, baseboard, projecting switches, nearby furniture and the space above the opening.
For an in-opening bypass kit, follow the manufacturer’s panel-height deductions and overlap requirements. For a wall-mounted system, establish the desired coverage beyond the jambs and above the opening, then coordinate the track-height formula with the actual hangers.
Door-leaf width, combined closed coverage and track length are different measurements. Do not double the opening width to size the leaves. A track may need substantial additional travel length, but that is a separate calculation.
A worked example for two equal bypass leaves
For two leaves covering an opening with specified side overlaps and one meeting overlap, the combined leaf width equals the opening width plus all those allowances. Divide by two only when the leaves are equal.
These allowances illustrate the geometry. Use the actual kit’s required overlap, edge gaps and preparation; an in-opening wardrobe system may use a different arrangement. Final clear access also depends on the stops, handles and stacked position.
Mirror doors: decide where you need the reflection
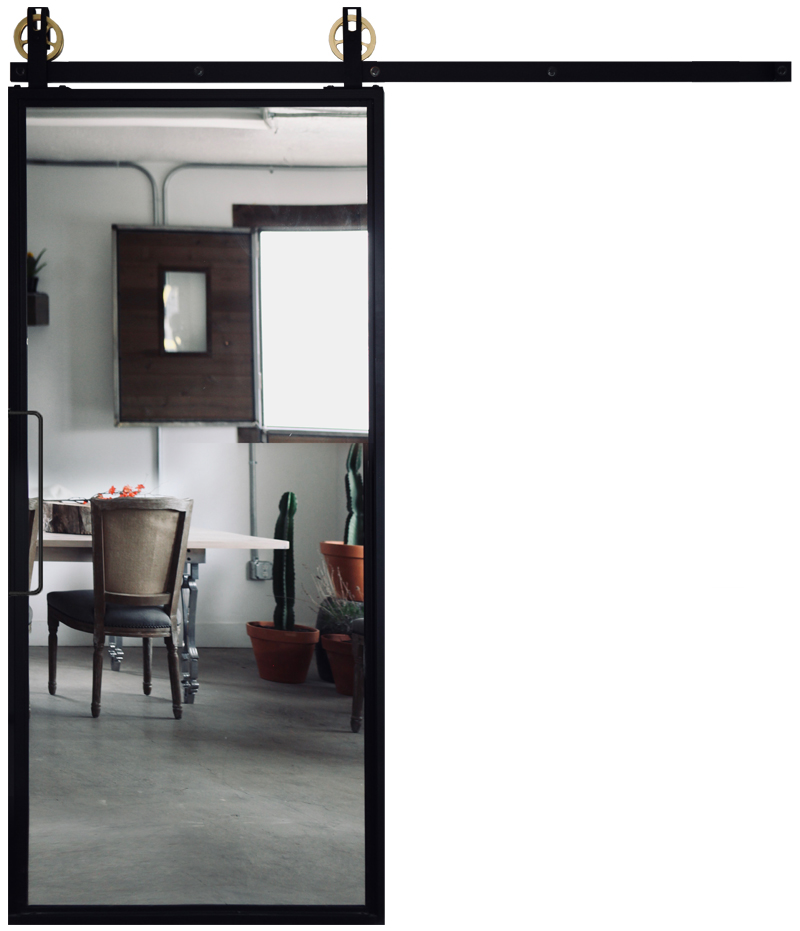
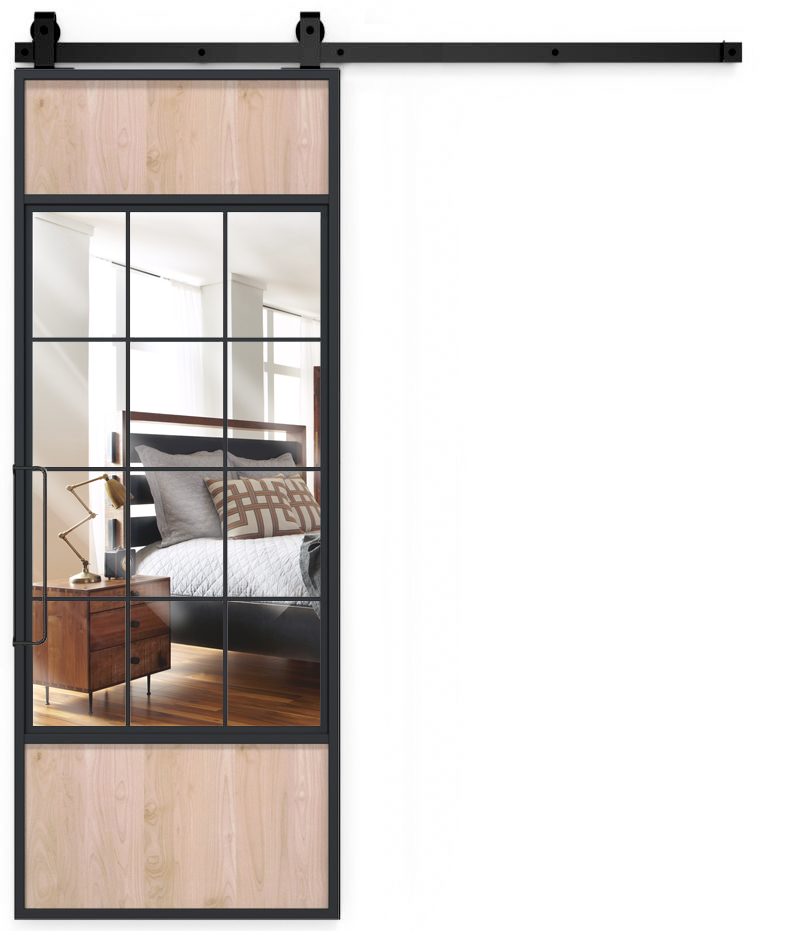
The Ponder Mirror Barn Door and French Orchard Mirror Barn Door offer different divisions across the mirrored face. Look at the full door from the position where you will dress. A decorative grid may be appealing while providing a less continuous reflection than a large plain mirror.
Specify which side has the mirror. A mirror facing into a walk-in closet serves a different purpose from one facing the bedroom. Check glare and the reflection of the bed, doorway or clutter; more reflected light is not automatically a better room composition.
Use a door-and-mirror assembly intended for the selected hardware. Adding a mirror to an existing leaf changes its weight and attachment demands. Do not assume an old wardrobe track can carry the heavier result.
Other faces and alternatives
Painted wood or a smooth panel: useful when you want the closet to recede into the wall. A new color or a restrained stencil can refresh a sound existing door without adding much thickness.
Clear or textured glass: clear glass displays the contents; textured glass softens the view to varying degrees. Test the actual glass under closet lighting. Frosting can obscure detail without completely hiding nearby shapes.
Wood grain or routed geometry: use the door as a feature, but compare its pattern with flooring and adjacent cabinetry. Strong patterns across several moving leaves may not align at every position.
Hinged, bifold, accordion or curtain: each can suit a different space constraint. Hinged French-style doors need a swing; bifolds and accordion systems retain a folded stack; curtains need a suitable support and remain a soft visual screen. A freestanding room divider also occupies floor space.
An open closet can work when you want everything visible, provided no special enclosure requirement applies. Choose it for the way you use and maintain the storage, not because removing doors creates new closet volume.
Refresh an existing door without compromising its operation
Before adding trim, overlays, wallpaper or hardware, check the weight allowance and the clearance between moving leaves. Projecting decoration can collide in a bypass system. Use adhesives approved for the actual surface, especially mirror backing; general construction adhesive is not automatically suitable.
Do not cut a large opening into an unknown door to install cane webbing. The internal structure may not support that alteration. Similarly, a replacement pull needs compatible preparation and adequate finger clearance, not just a matching finish.
Repair a damaged track or roller with the correct replacement component. Cosmetic changes should follow a sound, smoothly operating installation.
Guides and final operation
Some systems carry the weight at the top; others use bottom rollers. Follow the complete system design. A floor guide is not necessarily a load-bearing bottom track, and required guidance is not an optional accessory to omit for appearance.
Install all specified guides, stops and retention components before normal use. Move each leaf slowly through its full permitted travel, then open the storage drawers and test the grips in each position. Resolve rubbing, instability or blocked access before considering the project finished.
Updated .



