1.800.891.8312
800-891-8312
FREE SHIPPING*
Free Shipping Details
Most orders over $500 qualify. Free shipping applies to Barn Door Hardware, Barn Doors, and Pocket Doors over $500.
Note: Front doors, interior doors, shower doors, slab doors, any oversized door (wider than 3ft or taller than 7ft), and any special order doors have shipping costs calculated at checkout. Some barn door hardware track lengths do not qualify for free shipping.


How to Fix a Door That Won’t Latch
Thursday, May 21st, 2026
Author: Kate Allen - Rustica Founder and CEO
Share
A door that won’t latch can be a frustrating problem—and it’s downright stressful in bathrooms and bedrooms where your privacy is at stake. Luckily, there are simple steps you can try to fix the problem.
There are many reasons why a door won’t latch. Most of the time, it’s because of old hinges causing a sagging door—or the door wasn’t installed properly in the first place. For example, the door latch may not be perfectly aligned with the striker plate. Or there could be an issue with the door jambs.
No matter the cause, these step-by-step instructions will help you fix your door quickly.
Because there are several common reasons for a door not latching properly, the first step is to inspect your door and see if you can locate where the problem is. It may be helpful to check out our Parts of a Door article to familiarize yourself with common door terms. This will give you a better understanding of what you need to do as you follow our repair instructions.
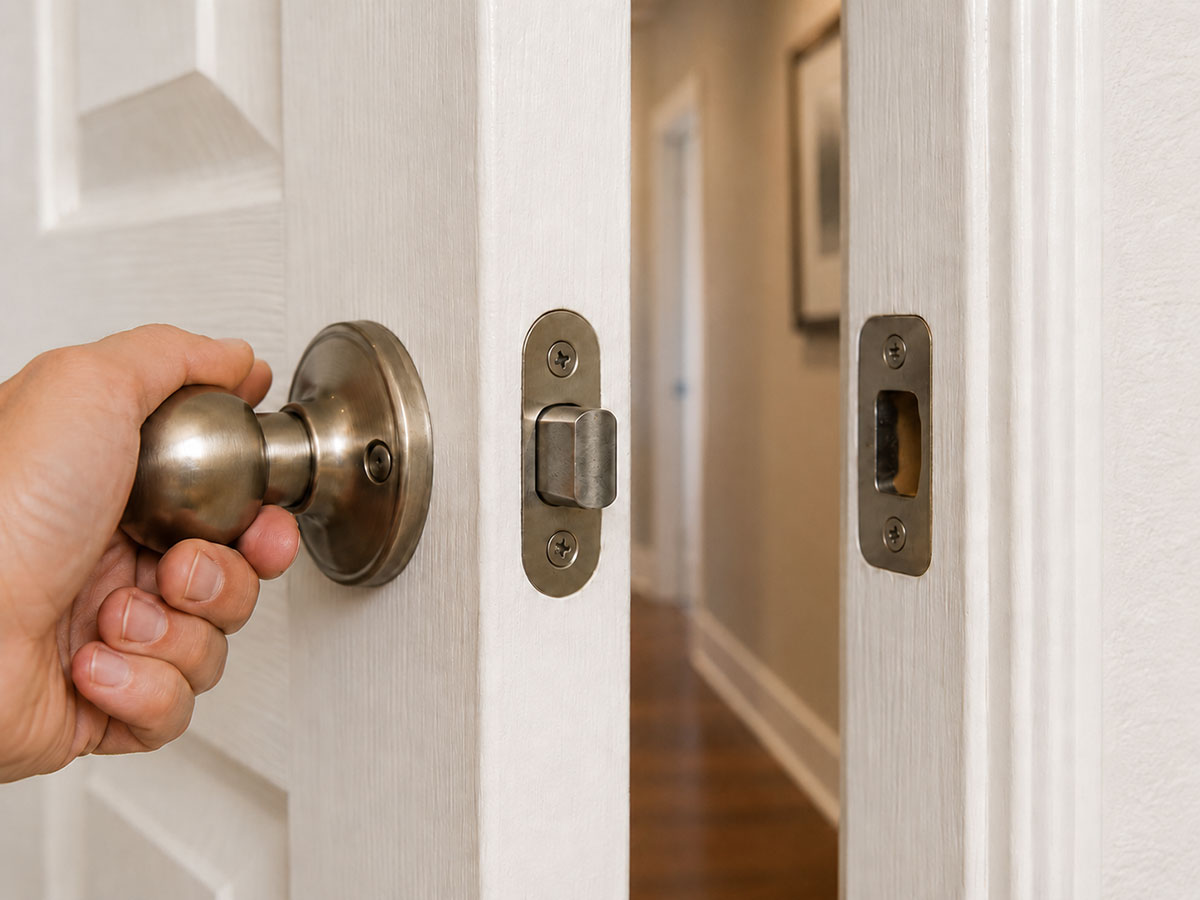
First, you’ll want to check the latch itself. Test the door handle a few times and see if the latch bolt is going in and out or sticking. If it’s sticking, that could be the source of the issue, and all you would need to do is apply some WD-40 to the latch mechanism. You’ll also want to check the strike plate hole to ensure there isn’t any debris that is preventing the latch from fully entering.
Next, you’ll want to check whether your door is out of alignment with the door frame. In an old house, it’s not uncommon for hinges to weaken and doors to sag, causing the door latch to miss the striker plate hole. To check this, inspect the gap between the door and the door frame to see if there are areas where the gap is larger or smaller.
To check whether your hinges are weak or loose and causing the misalignment, gently move the door side to side and see if there’s any movement.
If your door is misaligned, you’ll need to tighten the hinges, shim the hinges, or sand the jambs—all of which are covered in steps 3-5 below. You’ll also want to inspect where the latch bolt is misaligned with the strike plate hole.
This will tell you how out of alignment the door is, either because of sagging or because the strike plate simply doesn’t line up with the door. This is where the common “lipstick method” comes in handy. You will need to stick a piece of masking tape over the strike plate, then apply some lipstick (or chalk) to the latch bolt and gently close the door. The lipstick will show you where your latch is touching the strike plate, and how far off it is from the strike plate hole. This will also show you whether the latch is misaligned below the hole or above it, which can help you figure out which hinge is loose or needs shimmed.
Now that you’ve fully inspected your door, it’s time to gather your tools and get to work!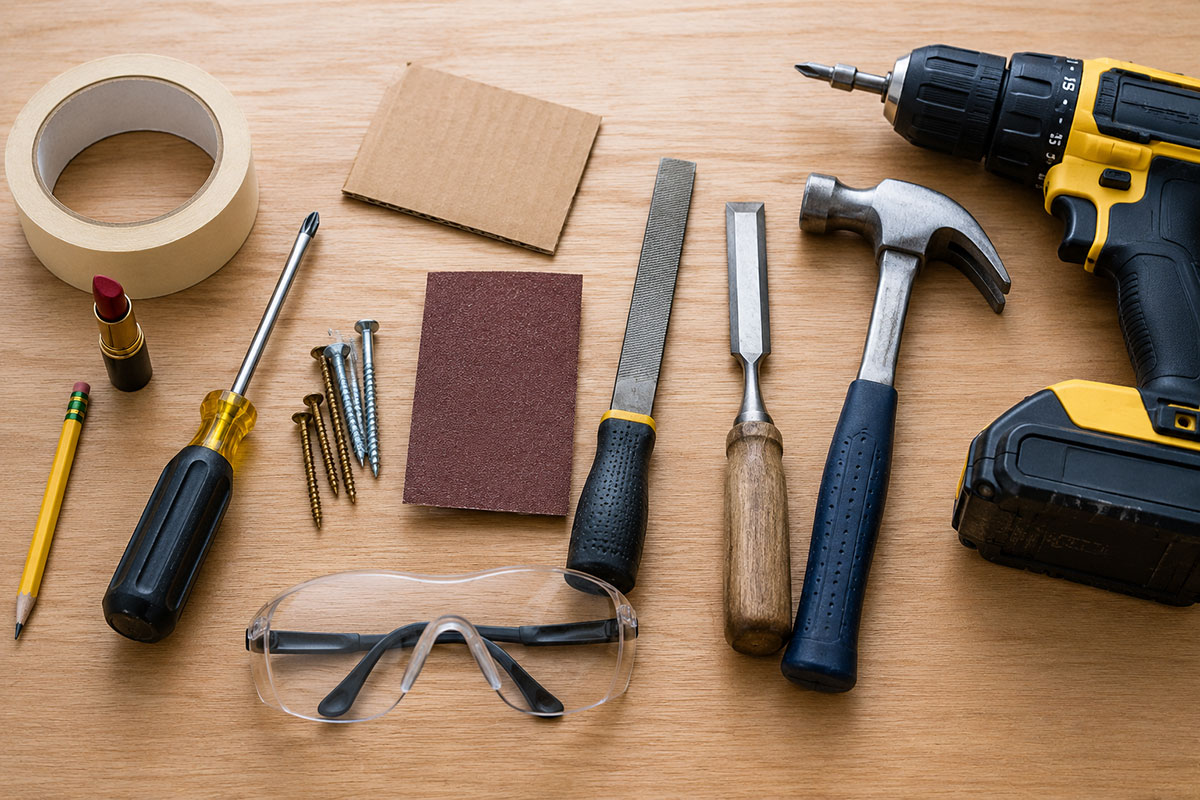
The following is a general list of tools and materials that cover everything you need for each step of the door repair process. Chances are, you won’t need all of these materials, but you can continue to reference this list as you try to figure out the issue.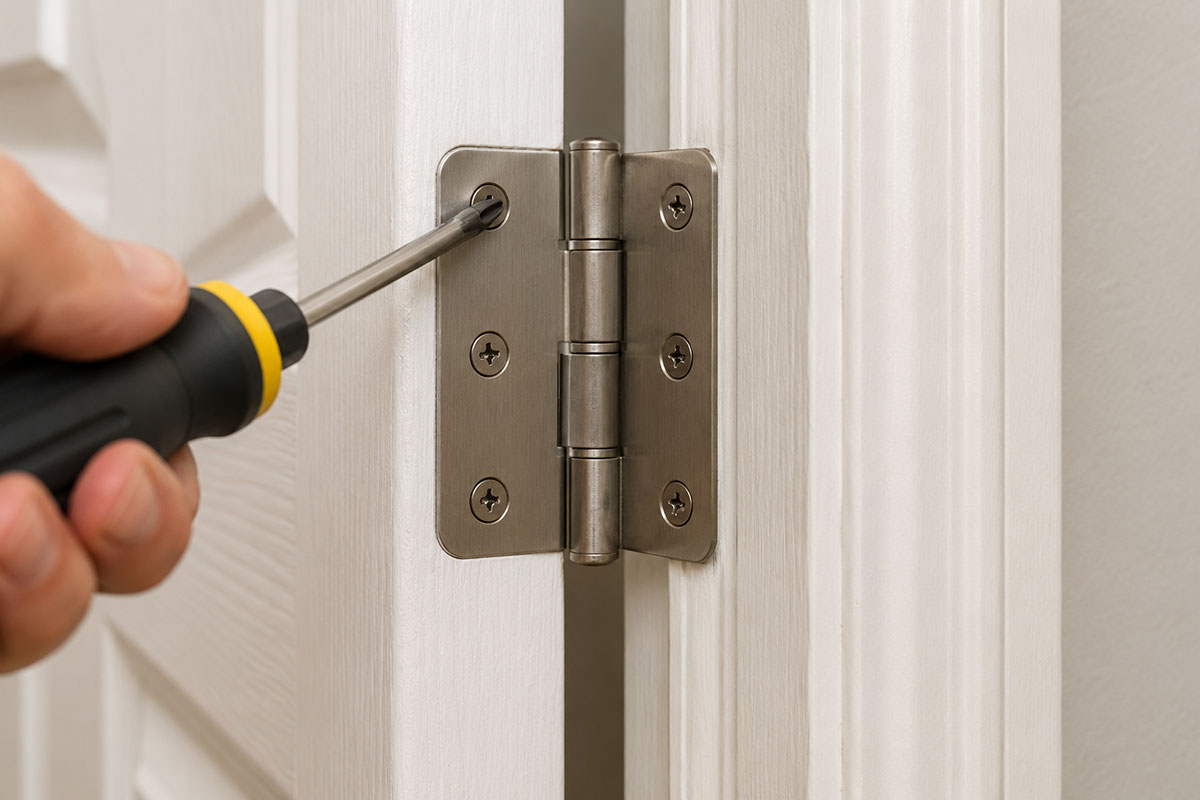
Before you do anything else, you’ll want to check and tighten your hinges. The problem could be as simple as a loose screw causing your door to sag and miss the strike plate hole. With a screwdriver, tighten each of your hinge screws.
If one of the screws keeps spinning, it’s stripped out, and could be the source of your problem. Take that screw out and replace it with a longer screw (2 ¼ or 3 inches).
As you’ll soon discover, the old hinge screws are quite short, so you’ll want to use a longer screw that goes into the door jamb and reinforces the door hinge.
After tightening or replacing the hinge screws, check to see if the door latches. If not, you’ll want to move on to the next steps.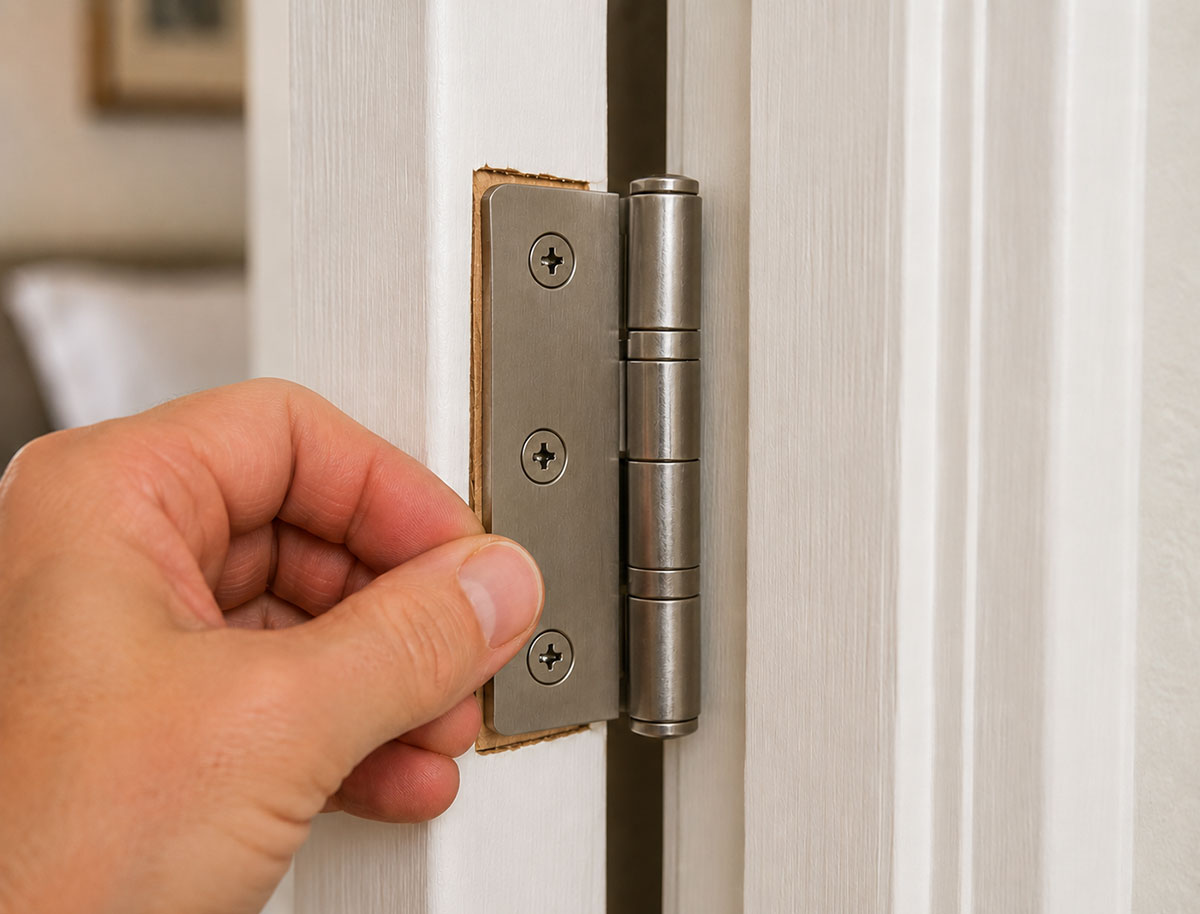
Due to aging, the hinge mortise (the chiseled-out section that allows the hinge to fit into the door jamb), can sink.
This can cause a gap between the door latch and the striker plate, causing the latch to miss the striker hole. Furthermore, if the top or bottom hinge mortise has sunk in, it can cause your door to become misaligned. In this case, you’ll want to shim the hinges.
Shimming requires you to remove the door hinges (or the hinge causing the door to sag) and place something in the mortise to help lift the hinge. This is also a great way to level the door—just add a shim to the bottom hinge to help pick the door up. Cardboard works well for this, or even playing cards cut to the right size.
Add a single layer of cardboard or stacked playing cards so that they are perfectly level with the edge of the hinge mortise. Then, screw the hinges back into place and check to see whether the door is latching properly.
If the door still isn’t latching, you’ll want to check to see if it’s rubbing against a jamb. If so, move on to the next step. If not, the issue may be the striker plate itself (step 6).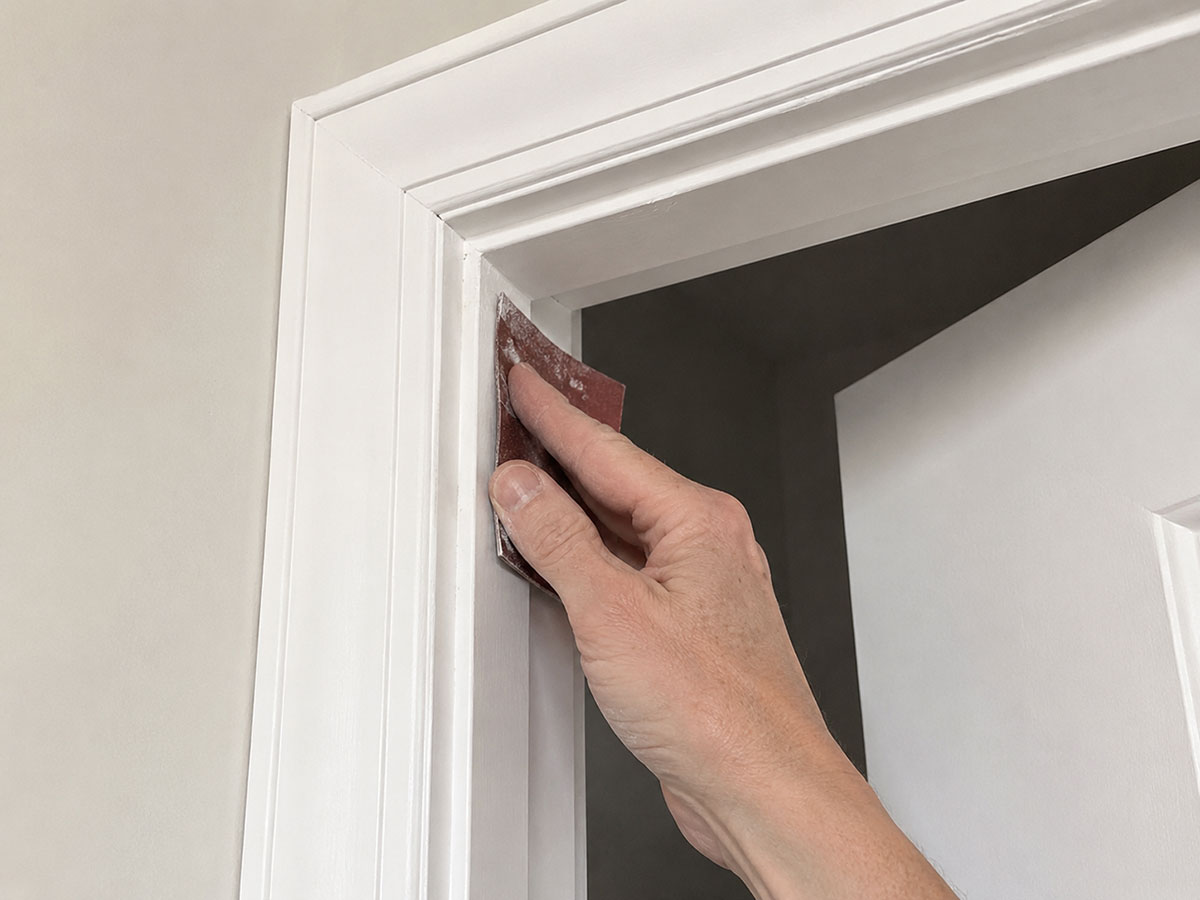
In an older house, it’s normal for the wood door jambs in the door frame to warp or bulge with age. When this occurs, the issue may not be with the hinges or a misaligned striker plate, it could simply be the door jambs.
A door that rubs against the door jamb could be difficult to close and open. It will feel stuck and make a squeaking noise when opening or closing.
Did you notice your door rubbing on the door jamb during your inspection? You may need to sand the door jambs down. To do so, use a piece of sandpaper or an orbital sander to sand down the jamb where the door is rubbing. This will allow your door to close smoothly without interference from the door jambs.
There’s no need to remove the strike plate, as you’ll be grinding down the edge of the metal as well as the wood when enlarging the hole. It’s best to use a curved metal file, as the curved file matches the round edge of the hole. Sanding the hole by hand with a curved file will take some time. But if the distance between the hole and latch is minuscule, this is your best option.
However, if you have to grind down quite a bit, you can use a Dremel tool with a Dremel carbide cutter. If you don’t have a Dremel, you can also use a drill bit, but it will spin slower than the Dremel.
In either case, wear protective eyewear so you don’t get metal in your eye while grinding. Now, if the distance between the latch bolt and the strike plate hole is around an eighth of an inch or more, you’ll need to move the entire strike plate (see next step).
This will show you where you need to make the new strike plate hole. Remove the strike plate with a screwdriver and set it aside.
Using a hammer and chisel, enlarge the strike plate mortise and carve out the latch hole to the depth of the previous hole. If you can’t screw the striker plate back into place because of an existing hole, you may need to fill it with wood filler before putting the plate back in. Let it dry completely before continuing.
Place the strike plate in the newly chiseled mortise and mark where each screw hole needs to be. Then, create your new screw holes.
Put your strike plate into its new position, and screw it into place. If one of the old screw holes interferes with your new screw hole, you can use the toothpick (or matchstick) method. This involves filling the old screw holes with the matchstick or toothpick so that your new screw can “catch” the door jamb and not fall out of place. If using matchsticks, you may need to file them down so they fit properly, then cut them back so they are flush with the wall surface.
Once your strike plate is properly secured in its new position, fill any existing gaps or holes with wood filler. Let the wood filler dry, then paint over it to match your door frame. Moving the strike plate should do the trick, but if you’re still having issues with your door not latching and you’ve tried every step listed above, it may be time to purchase a new door.
Now that you’ve learned how to fix a door that won’t latch, you’ll have this skill in your toolbelt for life. With simple step-by-step instructions, you can tackle most home DIY projects with ease. However, some issues may be bigger than we can take on. For instance, if your door still won’t latch and you’ve tried everything in this article, it may be time to invest in a new door.
Rustica has an impressive selection of handmade, artisan-designed doors, including interior doors, exterior doors, barn doors, pocket doors, and more.
There are many reasons why a door won’t latch. Most of the time, it’s because of old hinges causing a sagging door—or the door wasn’t installed properly in the first place. For example, the door latch may not be perfectly aligned with the striker plate. Or there could be an issue with the door jambs.
No matter the cause, these step-by-step instructions will help you fix your door quickly.
How to Fix a Door That Won’t Latch
- Inspect
- Gather Tools
- Tighten Hinges
- Shim the Hinges
- Sand the Jambs
- Enlarge the Strike Plate Hole
- Move the Strike Plate
1. Inspect
Because there are several common reasons for a door not latching properly, the first step is to inspect your door and see if you can locate where the problem is. It may be helpful to check out our Parts of a Door article to familiarize yourself with common door terms. This will give you a better understanding of what you need to do as you follow our repair instructions.
First, you’ll want to check the latch itself. Test the door handle a few times and see if the latch bolt is going in and out or sticking. If it’s sticking, that could be the source of the issue, and all you would need to do is apply some WD-40 to the latch mechanism. You’ll also want to check the strike plate hole to ensure there isn’t any debris that is preventing the latch from fully entering.
Next, you’ll want to check whether your door is out of alignment with the door frame. In an old house, it’s not uncommon for hinges to weaken and doors to sag, causing the door latch to miss the striker plate hole. To check this, inspect the gap between the door and the door frame to see if there are areas where the gap is larger or smaller.
To check whether your hinges are weak or loose and causing the misalignment, gently move the door side to side and see if there’s any movement.
If your door is misaligned, you’ll need to tighten the hinges, shim the hinges, or sand the jambs—all of which are covered in steps 3-5 below. You’ll also want to inspect where the latch bolt is misaligned with the strike plate hole.
This will tell you how out of alignment the door is, either because of sagging or because the strike plate simply doesn’t line up with the door. This is where the common “lipstick method” comes in handy. You will need to stick a piece of masking tape over the strike plate, then apply some lipstick (or chalk) to the latch bolt and gently close the door. The lipstick will show you where your latch is touching the strike plate, and how far off it is from the strike plate hole. This will also show you whether the latch is misaligned below the hole or above it, which can help you figure out which hinge is loose or needs shimmed.
Now that you’ve fully inspected your door, it’s time to gather your tools and get to work!
2. Gather Tools
The following is a general list of tools and materials that cover everything you need for each step of the door repair process. Chances are, you won’t need all of these materials, but you can continue to reference this list as you try to figure out the issue.
- Lipstick (or something to mark your latch bolt)
- Masking tape
- 4-in-1 screwdriver
- 2 ¼ or 3-inch long screws
- Cardboard (or something similar for shimming)
- Curved metal file
- Wood chisel
- Hammer
- Cordless drill (or Dremel)
- Drill bit set (or Dremel carbide cutter)
- Protective eyewear
- Wood filler
- Paint
3. Tighten Hinges
Before you do anything else, you’ll want to check and tighten your hinges. The problem could be as simple as a loose screw causing your door to sag and miss the strike plate hole. With a screwdriver, tighten each of your hinge screws.
If one of the screws keeps spinning, it’s stripped out, and could be the source of your problem. Take that screw out and replace it with a longer screw (2 ¼ or 3 inches).
As you’ll soon discover, the old hinge screws are quite short, so you’ll want to use a longer screw that goes into the door jamb and reinforces the door hinge.
After tightening or replacing the hinge screws, check to see if the door latches. If not, you’ll want to move on to the next steps.
4. Shim the Hinges
Due to aging, the hinge mortise (the chiseled-out section that allows the hinge to fit into the door jamb), can sink.
This can cause a gap between the door latch and the striker plate, causing the latch to miss the striker hole. Furthermore, if the top or bottom hinge mortise has sunk in, it can cause your door to become misaligned. In this case, you’ll want to shim the hinges.
Shimming requires you to remove the door hinges (or the hinge causing the door to sag) and place something in the mortise to help lift the hinge. This is also a great way to level the door—just add a shim to the bottom hinge to help pick the door up. Cardboard works well for this, or even playing cards cut to the right size.
Add a single layer of cardboard or stacked playing cards so that they are perfectly level with the edge of the hinge mortise. Then, screw the hinges back into place and check to see whether the door is latching properly.
If the door still isn’t latching, you’ll want to check to see if it’s rubbing against a jamb. If so, move on to the next step. If not, the issue may be the striker plate itself (step 6).
5. Sand the Jambs
In an older house, it’s normal for the wood door jambs in the door frame to warp or bulge with age. When this occurs, the issue may not be with the hinges or a misaligned striker plate, it could simply be the door jambs.
A door that rubs against the door jamb could be difficult to close and open. It will feel stuck and make a squeaking noise when opening or closing.
Did you notice your door rubbing on the door jamb during your inspection? You may need to sand the door jambs down. To do so, use a piece of sandpaper or an orbital sander to sand down the jamb where the door is rubbing. This will allow your door to close smoothly without interference from the door jambs.
6. Enlarge the Strike Plate Hole
Before enlarging the strike plate hole, you’ll want to do the lipstick test. This will show you how far off your latch is from the strike plate hole. If it’s barely missing the hole and you’ve already checked the hinges, one solution is to grind down the bottom of the striker hole with a file or Dremel.There’s no need to remove the strike plate, as you’ll be grinding down the edge of the metal as well as the wood when enlarging the hole. It’s best to use a curved metal file, as the curved file matches the round edge of the hole. Sanding the hole by hand with a curved file will take some time. But if the distance between the hole and latch is minuscule, this is your best option.
However, if you have to grind down quite a bit, you can use a Dremel tool with a Dremel carbide cutter. If you don’t have a Dremel, you can also use a drill bit, but it will spin slower than the Dremel.
In either case, wear protective eyewear so you don’t get metal in your eye while grinding. Now, if the distance between the latch bolt and the strike plate hole is around an eighth of an inch or more, you’ll need to move the entire strike plate (see next step).
7. Move the Strike Plate
If all else fails and your door latch is missing the latch hole by quite a bit, the next step is to move the strike plate to match the door latch. With a pencil, mark on the wall next to the strike plate where the latch is hitting.This will show you where you need to make the new strike plate hole. Remove the strike plate with a screwdriver and set it aside.
Using a hammer and chisel, enlarge the strike plate mortise and carve out the latch hole to the depth of the previous hole. If you can’t screw the striker plate back into place because of an existing hole, you may need to fill it with wood filler before putting the plate back in. Let it dry completely before continuing.
Place the strike plate in the newly chiseled mortise and mark where each screw hole needs to be. Then, create your new screw holes.
Put your strike plate into its new position, and screw it into place. If one of the old screw holes interferes with your new screw hole, you can use the toothpick (or matchstick) method. This involves filling the old screw holes with the matchstick or toothpick so that your new screw can “catch” the door jamb and not fall out of place. If using matchsticks, you may need to file them down so they fit properly, then cut them back so they are flush with the wall surface.
Once your strike plate is properly secured in its new position, fill any existing gaps or holes with wood filler. Let the wood filler dry, then paint over it to match your door frame. Moving the strike plate should do the trick, but if you’re still having issues with your door not latching and you’ve tried every step listed above, it may be time to purchase a new door.
From Repairs to Replacements: Rustica Has You Covered
Now that you’ve learned how to fix a door that won’t latch, you’ll have this skill in your toolbelt for life. With simple step-by-step instructions, you can tackle most home DIY projects with ease. However, some issues may be bigger than we can take on. For instance, if your door still won’t latch and you’ve tried everything in this article, it may be time to invest in a new door.
Rustica has an impressive selection of handmade, artisan-designed doors, including interior doors, exterior doors, barn doors, pocket doors, and more.


Rustica Shop & HQ 1060 Spring Creek PlaceSpringville Utah 84663Customer Service & Sales(800)-891-8312


PRODUCTS
FEATURES
COMPANY
BUSINESS