The door jamb is undoubtedly one of the most important yet overlooked things in your home. Without a door jamb, you wouldn’t have any place in your home to hang your exterior or interior doors. While often confused with the door frame, several parts of a door combine to create a door jamb including the:
What is a Door Jamb?
- Head Jamb
- Side Jamb
- Sill and Threshold
- Doorstop
- Casing
- Sidelight
- Mullion
- Weather Stripping
- Door Sweep
- Astragal
Each of these parts plays a key role in the functioning of the door jamb as a whole. Once you understand what each of these parts does, you can begin constructing your own door jamb or simply purchase an interior door jamb kit or exterior door jamb kit to install. Knowing where you’ll use the door jamb is important, as there are key differences between door jambs for interior doors and exterior doors.
What is a Door Jamb?
If a door jamb is different from a door frame, what is a door jamb? Simply put, a door jamb is the two vertical sides of the door frame. Without the door jamb, you wouldn't be able to hang your door because you wouldn't have any supports to hang the hinges. This is why most
prehung doors come pre-installed on door jambs.
If you simply purchase a
door slab, you will either need to make your own door jamb or purchase a door jamb kit. Door jambs are important for other reasons besides hanging your door. For example, a door jamb is used to make sure the door is level so it can easily open without striking the floor. Likewise, it is also used to create the mortise where the latch and deadbolt will go, providing
security for your home.
While the side jambs are the main component of a door jamb, it’s important to understand that there are several other parts of the door jamb that help it provide the necessary support for your door, which we’ll discuss below.
What Material is the Door Jamb Made From?
Whether you are building a door jamb or are simply tasked with door jamb repair, you need to know what you’re working with. Door jambs are often made from wood. Both softwoods and hardwoods have their advantages and disadvantages. Using a softwood (fir, hemlock, pine, etc.) can be beneficial given that they are easy to work with and affordable. Workability is especially important when it comes to installing hinges and creating mortises for latches and deadbolts. This is also why working with a hardwood, like oak, can be more difficult. It’s hard to work with, not to mention more costly.
Some door jambs are made from fiberglass, but wood is often the material of choice for most door jambs.
10 Parts of a Door Jamb
There are many different
types of doors, but they all have one thing in common—they all require a door jamb. While “door frame” and “door jamb” are often used interchangeably, they are two separate things. Knowing the
parts of a door jamb will help you understand the importance of it, while also ensuring you have installed the door correctly.

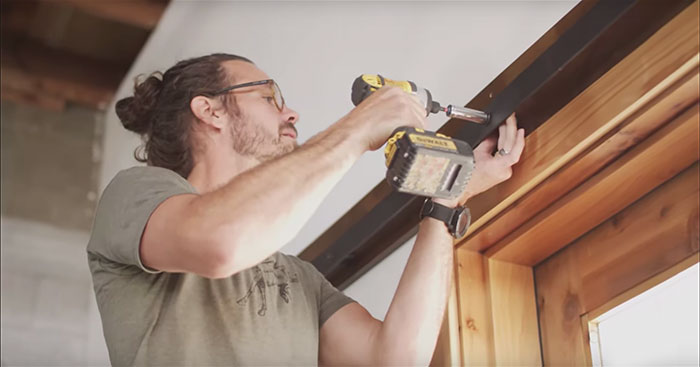
1. Head Jamb
The head jamb is the topmost part of the door jamb. It is the horizontal part of the door frame that runs along the top of the door, connecting the two side jambs. If you open any door in your home and look up, the board(s) that you see are the head jamb. This component of the door jamb may also be referred to as the top jamb.
2. Side Jamb
There are two side jambs in every door jamb. These two vertical boards connect to the head jamb to give stability to the door slab.
The side jambs are arguably the most important part of the door jamb. It is where you will attach the hinge and the door latch. It is also where you would install the door jamb switch for any automatic light to turn on when opening the door.
The side jambs are made of wood, allowing the mortise to be created for the door latch or to inset the door hinge. While “side jamb” is the most common name for this part of the door jamb, you may also see it called the hinge jamb.
3. Sill and Threshold
This is where interior and exterior doors begin to differ from one another. Only exterior doors have a sill and threshold. What is a sill and threshold? They are the counterpart to the head jamb, connecting the bottom of the two side jambs. The main board that connects the side jambs is referred to as the sill. It is directly fastened to the floor, adding to the overall stability of the door jamb.
The threshold is simply a cover that protects the sill from outside elements, such as rain and snow. While the sill may be made from wood, the threshold is made of a durable material, such as a piece of fiberglass or metal, so that it can withstand both the elements and any foot traffic it must endure.
4. Doorstop
Another important part of the door jamb is the doorstop. When you look at a door jamb, you’ll see there is a raised piece of trim towards the middle of the jamb. This raised part, known as the doorstop, runs along both of the vertical side jambs as well as the head jamb.
The doorstop is where the door slab will rest when the door closes. The part that comes in contact with the door is often flat so that the door closes snuggly against it. The opposite side of the doorstop is often rounded, giving the doorstop a smooth, sleek finish.
When there is a doorstop in the door jamb, the door can only swing one way. This means the placement of the doorstop is relevant to where the hinges are and the direction the door is supposed to swing. If your door is swinging without a problem, but is not closing tightly, you may need to adjust the placement of the doorstop to solve the issue.
5. Casing
Once you have the door jamb put together, it is normal to have a slight gap between the surrounding wall and the door. This is easily taken care of by installing trim or casing around the door.
Using trim around the door helps hide the gap and any imperfections or rough edges in the drywall. In other words, the casing is what helps hide your door jamb, allowing it to do its job to support your door while adding to the overall aesthetic of your home’s design. You can use a simple trim or a decorative trim, such as mitered casing or butted casing, whichever fits your home’s overall style.
It’s important to remember that casing is used on both interior doors and exterior doors. The type of casing required will vary depending on which type of door you are installing. Exterior doors often require brick moulding, which has a thicker profile and is made of materials such as aluminum, fiberglass, PVC, wood, etc. The brick moulding is also where you would attach a screen door.
6. Sidelight
Speaking of exterior doors, door jambs are slightly different depending on the style of entry door you select. If you are looking to flood your home with light, you may opt for a
sidelight. This is the window that runs along the vertical portion of your entry door. You may have a sidelight on either side of your entry door or even along both sides of your entry door. The sidelight is built into the door frame, slightly altering the overall structure of the door jamb.
7. Mullion
When you opt for a sidelight, the door jamb will need to consist of a mullion. A mullion is a piece of wood frame that sits between the door and the window. This piece of wood frame is where the door jamb will adhere to, rather than in the wall where it would have if there was no sidelight.
The mullion is covered by a piece of trim referred to as the mull casing (mull is short for mullion). While there is a mullion between the door jamb and the sidelight, the door jamb can be used as normal when it comes to installing the strike plate, door latch, deadbolt, hinges, etc.
8. Weather Stripping
For many, interior doors are easier than exterior doors, simply because they have fewer requirements.
An exterior door jamb has additional parts to keep the elements out of your home. One of these extra parts is weather stripping. It is essentially a seal that is placed on the door jamb to seal the gap between the exterior door jamb and the door slab.
Weather stripping can be made of many different materials such as silicone, rubber, and foam. Each of these materials is flexible and resistant to the elements. Having the proper weather stripping on your exterior doors will help keep drafts at bay and help
seal the door for winter.
9. Door Sweep
Like weather stripping, door sweeps are only found on exterior doors. You’ll attach the door sweep to the bottom of the door slab. It will fit snugly between the door slab and the threshold, keeping dust, moisture, and pests out of your home. Door sweeps can also help you save on energy bills by reducing the draft that comes into your home.
10. Astragal
You’ll also want to note the differences in the door jamb when it comes to
exterior double doors.
Double entry doors do not have a door jamb between the door slabs, allowing both doors to open for a wider entryway. This mainly affects the head jamb, the sill, and threshold as they will need to be wider than other door jambs to accommodate the double doors.
Another key difference is that you’ll need an
astragal, in addition to your door jamb. The astragal is similar to weather stripping in that it helps seal the gap between the two doors.
There are two different types of astragals. One type is where the astragal overlaps the other door. This requires the door without the astragal to close first so that the doors can seal properly. The other is a meeting stile, where each door has an astragal that meets each other to seal the gap between the two doors. This type of astragal is beneficial if you want both doors to open and close independently of one another.
How to Measure a Door Jamb
Whether you are building a door jamb or trying to replace a door jamb, the most important thing you can do is measure the door jamb correctly.
Door slabs are often more affordable, so it makes sense to either build your own door jamb or purchase a door jamb kit from a hardware or home improvement store. Most door jamb kits are designed to accommodate
standard door sizes.
To figure out which size interior door jamb kit or exterior door jamb kit you need, you’ll need to measure the door frame. Tools you will need include a tape measure, chisel, and hammer. The chisel and hammer can be used to tear off the casing around the door (you could also use a pry bar or screwdriver for this job).
It is important to break apart the caulking first to prevent the paint or caulking from stretching when you pull off the casing. Removing the trim, molding, or casing around your existing door before measuring is essential to ensure you get the most accurate measurements.
Once you have the casing removed you’ll have the rough opening exposed and you can accurately measure your door jamb.
To measure a door jamb, you’ll measure from the visible edges of the jamb, which is why it’s important to remove the casing first. Recording proper measurement requires measuring the door jamb’s height, width, and thickness. Here’s how to take each of these measurements:
Height: Measure from the top of the existing door jamb to the floor. You’ll want to keep in mind whether you’ll be changing your flooring and adjust the height accordingly (i.e. replacing tile with carpet)
Width. Make sure you measure the width of the head jamb to make sure it can accommodate your new door. Do this by measuring the existing head jamb from one side jamb to the other side jamb, making sure to exclude any shims and the door frame.
Thickness: When it comes to measuring the door jamb’s thickness, you’re essentially measuring the thickness of your wall. This will largely depend on the size of studs used in your construction, which can vary. The easiest way to measure the thickness of the door jamb is to measure the existing door jamb.
Standard Door Jamb Thickness
When it comes to door jamb thickness, there is no single standard to follow.
While some states have a standard requirement, depending on your home’s location and its age, your wall thickness (and door jamb thickness) may vary.
For example, if your home has two-by-four wall studs and half inch drywall, you’ll have a wall thickness of 4.5”. Many homes have two-by-four wall studs, and many pre-hung doors use 4-9/16 inches as a standard door jamb thickness. Based on these standards, you can purchase door jamb kits to install your own door jamb.
Door jamb kits are also sold with a standard door jamb thickness of 6-9/16 inches for homes constructed with two-by-six walls. Regardless of the wall studs used in your home, it is important to remember that any walls that contain plumbing will be thicker than other walls. This is why it is always important to confirm your wall thickness before picking up a standard door jamb kit or door jamb repair kit from your local home improvement store.
Accuracy Matters When Measuring a Door Jamb
When it comes to building your own door jamb or using a door jamb kit, accurately measuring your door jamb and purchasing the right size is important if you want your door to work correctly.
Purchasing or making a door jamb that is too small can leave you with a gap that exposes your rough opening or framing. On the other hand, if your door jamb is too large, then you’ll need to do extra work with a door jamb saw to trim it down to size so that it fits in your rough opening.
While it is possible to trim the door jamb down to size or simply add a wider casing to hide the rough opening, installing a jamb that is not the correct size can create other problems, such as trouble closing the door or ensuring it has a tight seal to keep out the elements.
Be careful when measuring. If you are measuring an existing door, always be sure you are measuring just the jamb and not any additional shims used in leveling and securing the door jamb and frame in place.
What To Do If Your Door Jamb Isn’t Big Enough?
If you change your home’s siding, add paneling, or replace a door in an old home, you may find that there is a difference between the thickness of your wall and the thickness of your door jamb.
To ensure the door jamb fits properly, you can purchase a door jamb extension kit. These kits often include the needed materials to extend both side jambs, head jamb, and sill to help you widen the jamb so that it fits properly.
Installing a Door Jamb
Once you have your measurements, you need to know how to install a door jamb. Improper installation can leave you with a whole host of problems, such as an uneven or sagging door, a door that doesn’t close or seal properly, or a casing that reveals your rough opening or door frame. As mentioned before, if your door jamb isn’t big enough, you’ll need to use a door jamb extension to ensure the proper fit when installing the door jamb.
Fit is everything when it comes to installing a door jamb. If your door jamb is off by even a little bit, you will have problems with your door. In such instances, you want to make sure your door jamb is level by adding shims where needed. You may also need to use a door jamb saw to help the jamb fit properly with your flooring.
Once you’ve installed your door jamb properly, your door should swing open and closed smoothly. If it is an exterior door, proper installation also means proper sealing to prevent a draft from entering your home.
Door Jambs Support Every Door
While much of the credit is given to the door frame, in reality, the door jamb does most of the work in making sure your door functions properly. Understanding what the different parts of the door jamb are and their specific purpose can help you make the necessary adjustments to install your door jamb correctly, whether it is a simple door jamb for an interior door or a more complex jamb for exterior doors and entry doors.
Every doorway in your home requires a door jamb, regardless of the type of door you decide to hang. Knowing this information can be valuable whether you are constructing a new home or remodeling your existing home. No matter which route you decide—building your own or purchasing a door jamb kit—you now have the information you need to decide which is right for you. With a properly installed door jamb, you can pick an entry door with sidelights, a
Dutch front door,
interior barn doors, or any style that matches your home’s decor. Shop with Rustica to find the perfect door to make your home complete.