


Begin with a dimensioned door plan
Measure the finished opening, its casing and the wall where the door will park. Set the leaf’s width from the required coverage, and its height from the selected hardware’s floor gap and track geometry. Add the door’s complete thickness—including overlays—to the clearance drawing.
Record the hanger attachment zones, handle position and any bottom-guide groove on the same drawing. A handsome panel is not ready to hang if its top edge cannot take the specified fasteners. Include the final door weight when selecting the track and support.
Use the door measurement guide to distinguish the leaf from the opening. A sliding leaf commonly covers an opening from the wall face; it does not automatically use the same size as a hinged slab removed from that opening.
Choose a construction that suits your tools
| Route | What you make | What must be resolved |
|---|---|---|
| Pre-machined kit | Assemble labeled stiles, rails, slats and overlays. | Match the kit manual, dry-fit the parts and use the specified fasteners. |
| Raw lumber and a woodworking plan | Mill and join a complete door from a dimensioned design. | Joinery, panel movement, flatness, hanger support and a complete cut list. |
A frame-and-panel design gives the panel room to move within its surrounding members. A properly designed edge-glued panel can also be used in suitable construction. These are different approaches; neither is improved by indiscriminately gluing every crosspiece across the grain.
For a first project, a pre-machined kit removes much of the milling and joinery work. Building from raw stock makes sense when you have a suitable plan and the tools to produce straight, square, consistent parts. A decorative X alone does not correct an unstable panel.
If starting from lumber: prepare and dry-fit first
Select sound, reasonably straight material suitable for the intended location. Let it acclimate under the conditions required by the lumber, design and finish system. Measure moisture where appropriate; leaving boards in a room for an arbitrary number of days does not prove they are ready.
Prepare a cut list from the actual drawing, allowing for joints and final trimming. Mill reference faces and edges, then cut matching parts consistently. Mark the face, orientation and location of each component so the grain and joinery remain coordinated during assembly.
Dry-fit the entire door on a flat support. Check overall size, diagonals, joint fit and twist before applying any adhesive. Use clamps and cauls appropriate to the plan to hold the work evenly, and recheck alignment after tightening them.
Apply glue only where the design calls for it. Solid wood moves across the grain with moisture changes, so cross-grain attachments need an allowance for that movement. Alternating visible growth-ring direction is not a substitute for sound material preparation and joinery.
Reference: USDA Forest Products Laboratory: Wood Handbook.
Prepare the illustrated Half X kit
The sequence below follows Rustica’s Half X assembly instructions. It applies to the labeled, pre-machined components shown here—not to every DIY barn door. Check the manual supplied with your order if its parts or preparation differ.
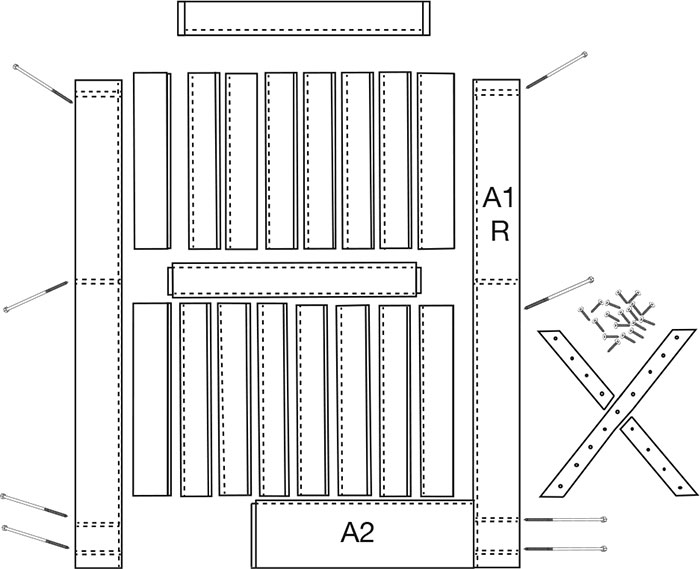
Lay the parts on a flat, protected surface. Identify the left and right stiles, bottom/middle/top rails, upper and lower slats, diagonal pieces and supplied fasteners. Inspect for shipping damage before assembly. Keep any bottom guide groove oriented toward the floor.
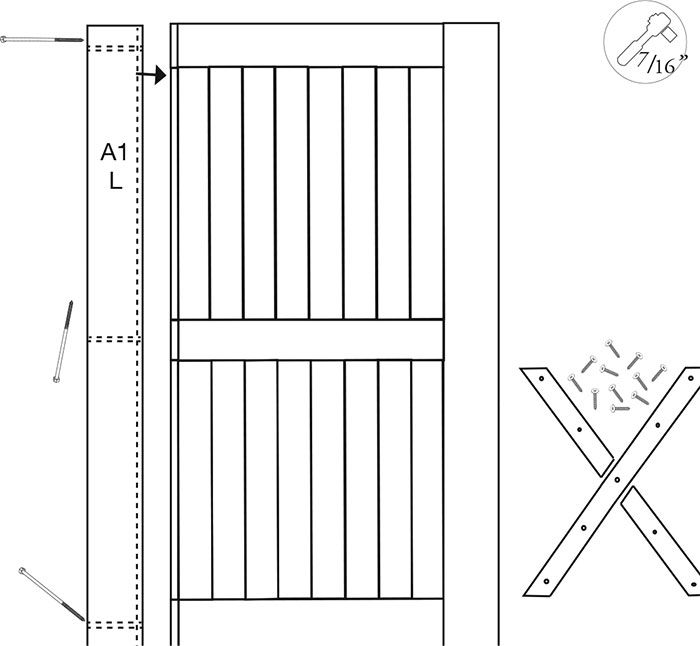
Assemble this kit without glue or adhesive. The published Half X manual specifically calls for dry assembly. Have a drill with a Phillips bit and the specified socket ready; the illustrated version uses a 7/16-inch socket for its frame bolts.
Half X assembly: start with the lower panel
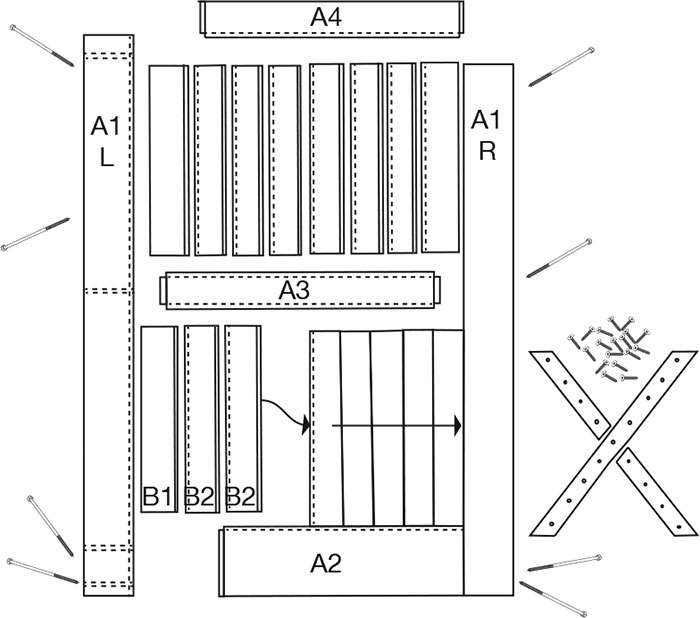
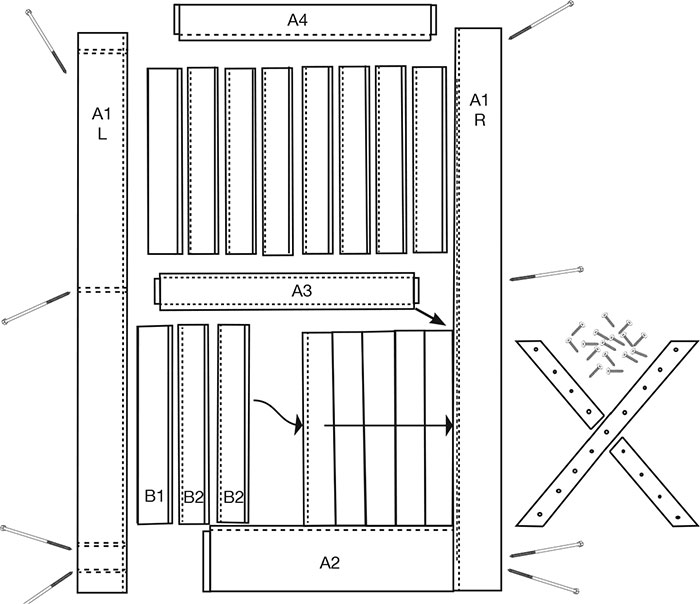
1. Fit bottom rail A2 into the groove of right stile A1R.
2. Insert the B-series lower slats into the bottom rail and right stile, matching the tongue-and-groove orientation shown in the parts diagram. End slats differ from the intermediate slats.
3. Complete the lower slat field, then seat middle rail A3 over the slat tops. Keep the assembly supported and the joints properly engaged rather than forcing a misoriented part into place.
Half X assembly: close the frame and add the X
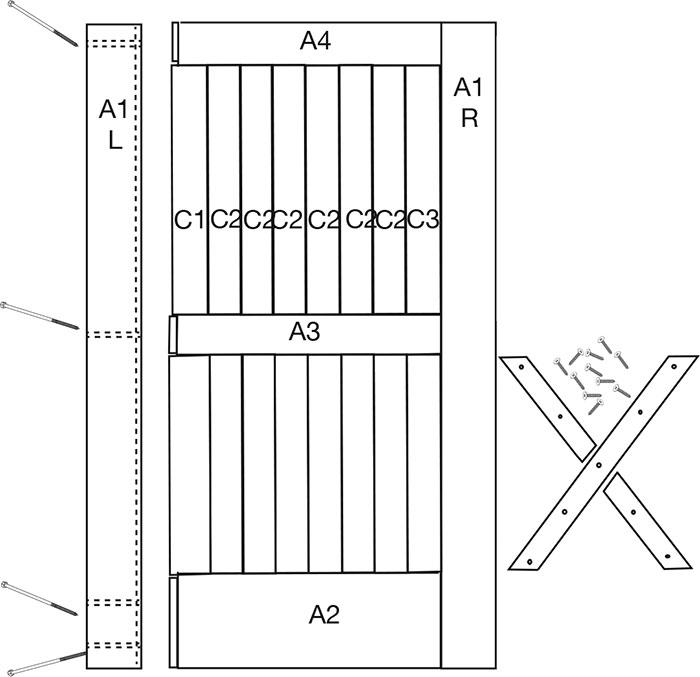
4. Fit the C-series upper slats into the right stile and middle rail. Install top rail A4, then bring left stile A1L into position.
5. With help holding the parts in alignment, start the specified frame bolts by hand. For the illustrated kit these are six-inch lag bolts. Check that the slats are seated and the door remains straight before tightening with the socket.
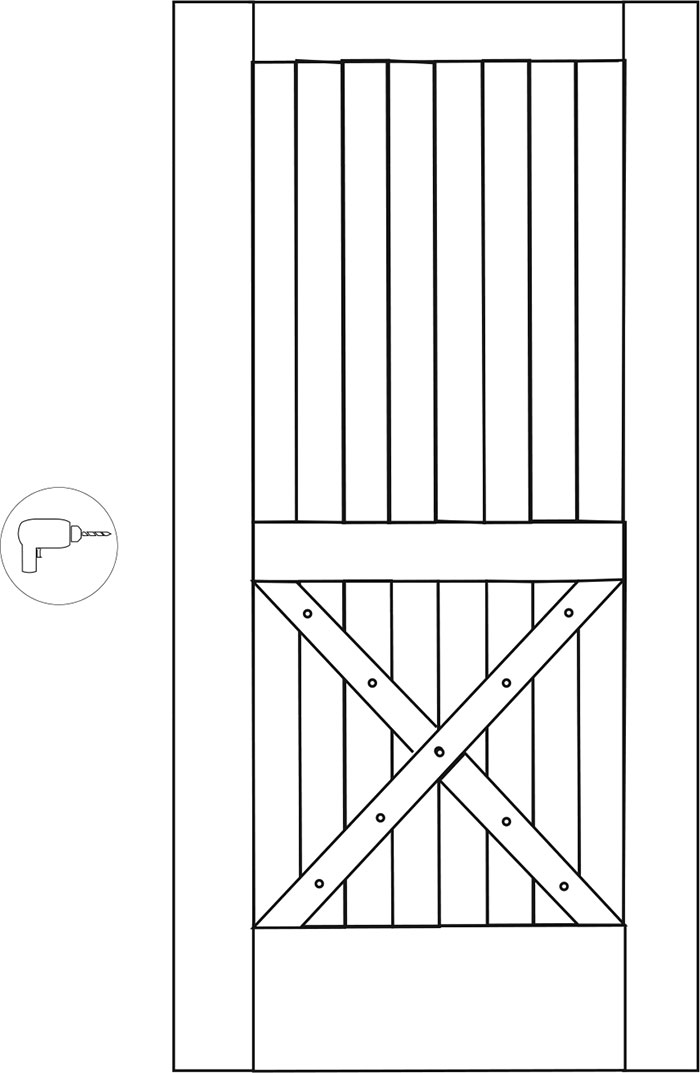
6. Position A5, A6 and A7 with their prepared holes facing upward to form the lower X. Attach them using the specified screws; the illustrated manual identifies 1¼-inch grabber screws. Quantities and details can vary with door size.
Finish the wood before final installation
Check the assembled surface and joints before sanding. Ease or prepare edges only as the design permits, and keep the guide groove and hardware preparation within specification. Remove sanding dust without leaving a residue that interferes with the finish.
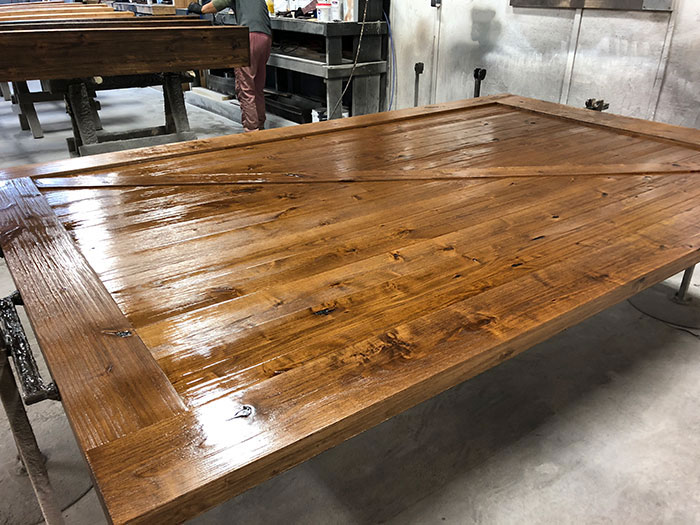
For a stained door, test the color and any conditioner on matching wood, then apply a compatible protective finish. Follow the wood-door staining guide. Paint requires its own surface preparation and primer choice; see painting a barn door.
Treat all required faces and edges according to the finish and door instructions. Observe recoat times and curing requirements before handling or installing hardware. A finish does not convert an interior kit into an exterior-rated door.
Hang the completed door and verify its operation
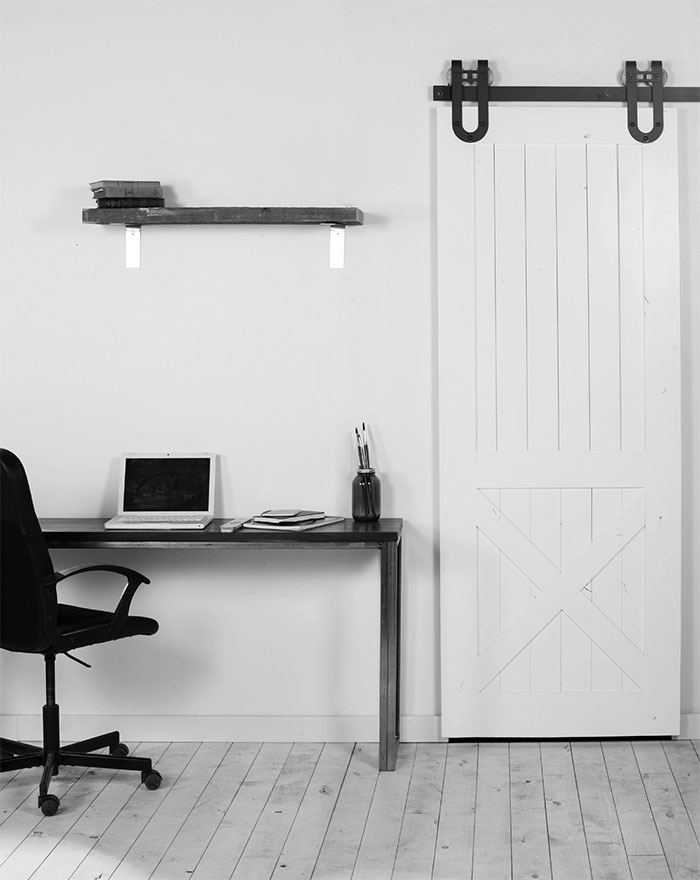
Confirm the final weight and dimensions, then install the chosen hangers and pull using their templates. Mount the track to suitable structural support. Plan the lift with enough help or appropriate equipment for the completed leaf.
Install the required stops, bottom guide and anti-jump components before normal use. Move the door slowly through its allowed travel, checking that it clears the floor and wall and remains engaged with the guide. Resolve any twist, rubbing or loose attachment before putting it into service.
Keep the assembly and hardware instructions with the project record. They are useful later when a finish needs maintenance or a component needs replacement.
Updated .



